Homemade Butter
How to Make Homemade Butter From Scratch
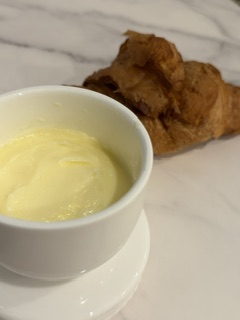
Making homemade butter is ridiculously easy. Seriously. You take heavy whipping cream, let it whip until the butter separates, and before you know it, you’ve got fresh, creamy butter sitting in your kitchen.
I started making more food from scratch because I wanted to know exactly what was going into the things I was eating. When an ingredient list starts looking like a chemistry assignment, I’m out. 😂 Homemade butter keeps things simple: cream, optional salt, and that’s basically it.
If you’ve got some heavy cream and a little patience, you’re already halfway there.
Why Make Homemade Butter?
There’s something pretty satisfying about making something yourself that you normally grab at the grocery store.
Homemade butter is:
- Easy to make
- Made with simple ingredients
- Fresh and creamy
- Customizable
- Perfect for cooking and baking
- Delicious spread on homemade bread
And honestly, watching cream turn into butter is pretty damn cool.
What You Need to Make Homemade Butter
You only need a few basic supplies:
- Heavy whipping cream
- Large mixing bowl
- Whisk or mixer
- Fine-mesh strainer – optional
- Cold water
- Salt – optional
That’s it.
How to Make Homemade Butter
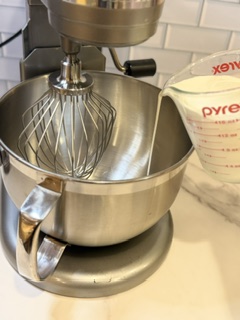
1. Add the Heavy Cream
Pour your heavy whipping cream into a large mixing bowl.
Make sure your bowl is large enough to prevent splashing once the cream starts separating.
2. Whip the Cream
Start whipping the cream.
At first, it will look like nothing more than cream.
Then it will become whipped cream.
Keep going.
This is not the time to stop. We’re going past whipped cream today.
3. Watch for the Butter to Separate
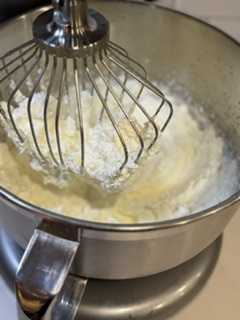
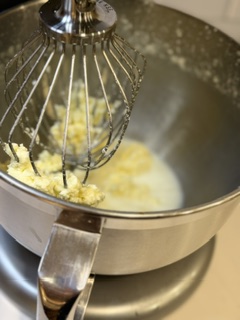
As you continue whipping, the cream will become thicker and grainier.
Then suddenly, you’ll see yellowish clumps of butter separate from a thin liquid.
Congratulations—you just made butter. 🎉
The liquid is buttermilk, so don’t pour it down the drain just yet.
4. Drain the Buttermilk
Pour the mixture through a fine-mesh strainer, separating the butter from the liquid.
Gently press the butter with a spoon or spatula to remove as much liquid as possible.
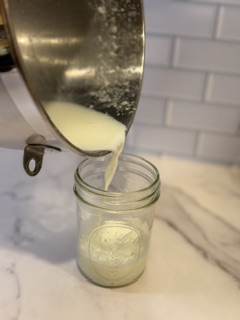
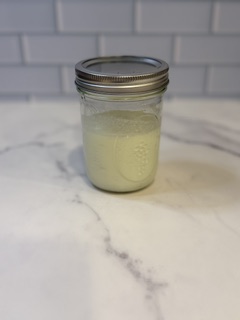
Save the buttermilk!
It’s fantastic for pancakes, biscuits, waffles, and other homemade baked goods.
5. Rinse the Butter
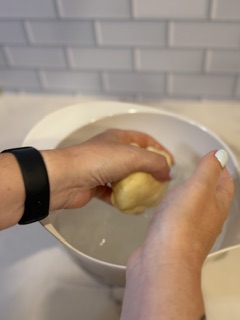
Place the butter in a bowl and cover it with very cold water.
Gently press and work the butter with a spoon or clean hands.
Drain the water and repeat with fresh cold water until the water is mostly clear.
This removes leftover buttermilk from the butter.
6. Add Salt
If you want salted homemade butter, add salt to taste and mix it into the butter.
Want unsalted butter? Skip the salt.
Easy.
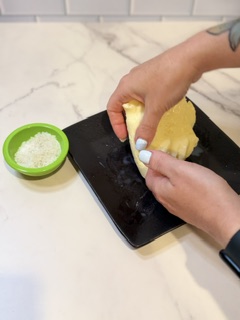
7. Shape and Store
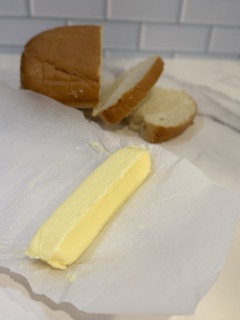
Shape your butter into a block, log, or whatever shape makes you happy.
Place it in an airtight container and refrigerate.
Now you’ve got homemade butter ready for toast, bread, pancakes, biscuits, baking, cooking, or eating straight off the spoon.
Okay, maybe don’t eat it straight off the spoon.
But no judgment.
How Long Does It Take to Make Homemade Butter?
The exact time will depend on how you’re whipping the cream and how much cream you’re using.
Instead of watching the clock, watch the cream.
You’ll see it go through several stages:
Cream → Whipped Cream → Thick/Grainy Cream → Butter + Buttermilk
Once the butter separates from the liquid, you’re there.
Don’t Throw Away the Buttermilk!
Don’t throw away that buttermilk! Save it for pancakes, biscuits, waffles, and other baked goods. If you’re looking for more ways to use it, check out these buttermilk recipes for some inspiration.
One of the best parts about making homemade butter is getting a little bonus ingredient.
The leftover buttermilk can be used in:
- Pancakes
- Biscuits
- Waffles
- Muffins
- Cornbread
- Quick breads
So basically, making butter gives you another excuse to make more homemade food.
I’m not complaining.
How to Store Homemade Butter
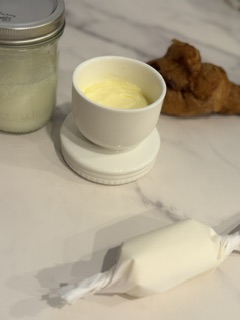
Keep your homemade butter in an airtight container in the refrigerator.
Because homemade butter is a fresh dairy product, proper food storage and refrigeration are important for keeping it fresh.
You can also freeze homemade butter if you want to keep it longer.
Ways to Use Homemade Butter
Once you’ve made your own butter, you’ll find plenty of excuses to use it. Try it on:
- Homemade bread — spread your fresh butter over a warm slice of [homemade bread] for the ultimate from-scratch combo.
- Toast
- Pancakes
- Waffles
- Biscuits
- Dinner rolls
- Baked potatoes
- Corn on the cob
- Roasted vegetables
You can also turn it into flavored butter with garlic, fresh herbs, honey, cinnamon, or your favorite seasonings.
Homemade AF Tips
Use cold water when rinsing. It helps keep the butter firm while you work with it.
Don’t skip the rinsing step. Removing leftover buttermilk helps your butter stay fresh.
Use a large bowl. Once the butter separates, things can get a little splashy.
Save the buttermilk. Seriously. Pancakes are calling.
Frequently Asked Questions
What kind of cream do I need to make butter?
Heavy whipping cream is the best choice for making homemade butter because of its high fat content.
Why does my cream turn into whipped cream?
That’s completely normal. The cream becomes whipped cream before the butterfat eventually separates from the liquid. Keep whipping.
What is the liquid that comes out when making butter?
The liquid is buttermilk. Save it for pancakes, biscuits, waffles, or other recipes that use buttermilk.
Final Thoughts
Making homemade butter from scratch is one of those recipes that looks impressive but is actually incredibly simple.
You start with heavy cream, whip it until the butter separates, rinse it, add a little salt if you want, and you’re done.
That’s my kind of recipe.
Simple ingredients. Real food. No unnecessary crap. That’s Homemade AF.

Homemade Butter Recipe
Ingredients
Method
- Pour the heavy whipping cream into the bowl of a stand mixer.
- Using the whisk attachment, beat the cream on medium-high speed. The cream will first become whipped cream before continuing to separate.
- Continue mixing until the butter separates from the buttermilk. You will see solid yellow butter clumps and thin, milky buttermilk.
- Strain the butter from the buttermilk, reserving the buttermilk for baking or other recipes.
- Place the butter in a bowl and rinse it with very cold water. Gently press and knead the butter to remove as much remaining buttermilk as possible.
- Continue rinsing and pressing until the water runs mostly clear.
- Mix in the salt, if desired.
- Shape the homemade butter into a log or place it in a container. Refrigerate until ready to use.
Notes
- Use cold heavy whipping cream for the best results.
- Removing as much buttermilk as possible helps the homemade butter stay fresh longer.
- Salt can be adjusted to taste or left out for unsalted butter.
- Save the fresh buttermilk for pancakes, biscuits, bread, and other baking recipes.