
Homemade Strawberry Jam
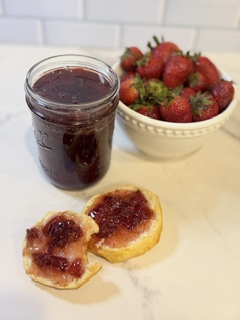
There’s just something about homemade strawberry jam that makes breakfast feel a little more special. Sweet, fruity, and made with fresh strawberries, this easy homemade strawberry jam is simple to make and tastes so much better than the store-bought stuff.
Spread it on warm toast, homemade bread, biscuits, pancakes, or anything else that needs a little strawberry goodness.
And if you’re already making your own bread and butter? Well, you’re officially committed to the homemade life. Might as well make the jam too.
Why You’ll Love This Recipe
- Easy to make – No complicated steps or fancy equipment.
- Fresh strawberry flavor – Sweet, fruity, and delicious.
- Made from scratch – Simple ingredients and homemade goodness.
- Perfect for breakfast – Spread it on toast, biscuits, pancakes, or homemade bread.
- Great for gifting – Homemade jam makes a thoughtful edible gift.
Ingredients
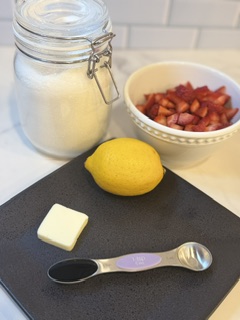
You only need a few simple ingredients to make this easy strawberry jam:
- Fresh strawberries
- Granulated sugar
- Lemon juice
Fresh strawberries: Choose ripe, flavorful strawberries for the best-tasting jam.
Sugar: Adds sweetness and helps create the thick, spreadable consistency.
Lemon juice: Adds a little brightness and balances the sweetness of the strawberries.
How to Make Homemade Strawberry Jam
1. Prepare the Strawberries
Wash the strawberries, remove the stems, and chop them into small pieces.
If you prefer a smoother jam, you can mash the strawberries more as they cook. For a chunkier jam, leave some larger pieces.
2. Combine the Ingredients
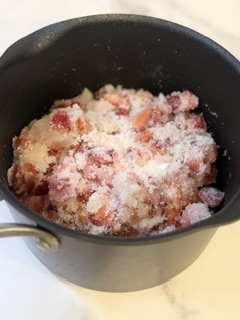
Add the strawberries, sugar, and lemon juice to a saucepan.
Stir everything together and allow the strawberries to begin releasing their juices.
3. Cook the Strawberry Jam
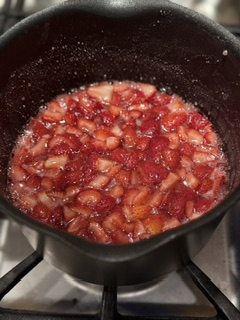
Bring the mixture to a gentle boil over medium heat, stirring frequently.
As the strawberries cook, they will soften and the mixture will begin to thicken.
Continue cooking until the jam reaches your desired consistency.
4. Cool the Jam
Remove the saucepan from the heat and let the strawberry jam cool.
Keep in mind that jam will continue to thicken as it cools, so don’t worry if it looks slightly thinner while it’s still hot.
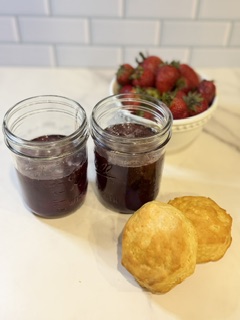
Once cooled, transfer the jam to a clean jar or container and refrigerate.
The Best Way to Eat Homemade Strawberry Jam
Let’s be honest—there are plenty of ways to eat strawberry jam, but spreading it over warm, buttery homemade bread is hard to beat.
If you haven’t made your own bread yet, try my [homemade white bread]. It’s soft, fluffy, and perfect for slathering with strawberry jam.
Then add a little [homemade butter] underneath the jam.
Now we’re talking.
The combination of warm homemade bread, creamy homemade butter, and sweet strawberry jam is basically the homemade breakfast trifecta.
Ways to Use Homemade Strawberry Jam
Not just for toast. Try it on:
- Homemade white bread
- Toast
- Biscuits
- Pancakes
- Waffles
- French toast
- English muffins
- Oatmeal
- Cheesecake
- Ice cream
- Yogurt
- Peanut butter sandwiches
- Thumbprint cookies
- Cakes and cupcakes
You can also use strawberry jam as a filling for pastries or swirl it into desserts for extra strawberry flavor.
Tips for Making the Best Homemade Strawberry Jam
Use ripe strawberries. The better your strawberries taste, the better your jam will taste.
Don’t rush the cooking process. Let the strawberries cook down gradually so the mixture has time to thicken.
Stir frequently. This helps prevent the jam from sticking to the bottom of the pan.
Don’t judge the consistency while it’s hot. Strawberry jam thickens as it cools, so it may look looser in the saucepan than it will once refrigerated.
Adjust the texture to your liking. Mash the strawberries more for a smoother jam or leave larger pieces for a chunky strawberry spread.
Homemade Strawberry Jam for Breakfast
One of my favorite ways to enjoy this homemade strawberry jam is with a simple slice of warm [homemade white bread], a generous swipe of [homemade butter], and a big spoonful of strawberry jam.
It’s simple, homemade, and ridiculously good.
That’s exactly what Homemade AF is all about—taking basic ingredients and turning them into something worth sitting down for.
How to Store
Allow the jam to cool before transferring it to a clean, airtight container.
Store homemade strawberry jam in the refrigerator and use it according to your recipe’s storage guidance.
Important: This recipe is intended as a refrigerator jam unless you’ve followed a tested water-bath canning recipe and proper canning procedures. Don’t store homemade jam at room temperature simply by putting it in a jar.
Frequently Asked Questions
How long does homemade strawberry jam last?
Refrigerated homemade jam generally keeps for a limited period, but the exact storage time depends on the recipe, sugar level, acidity, preparation, and storage conditions. When in doubt, follow the specific storage guidance for your recipe.
Can I use frozen strawberries?
Yes, frozen strawberries can work, although fresh strawberries will give you the brightest fresh-strawberry flavor. Thaw and drain them before using if your recipe calls for fresh berries.
Can I make strawberry jam with less sugar?
You can, but sugar affects both sweetness and the final texture of jam. If reducing the sugar significantly, use a recipe specifically formulated as a low-sugar jam rather than simply cutting the sugar in a standard recipe.
What can I eat with homemade strawberry jam?
Try it on toast, homemade bread, biscuits, pancakes, waffles, French toast, oatmeal, yogurt, cheesecake, or ice cream.
Final Thoughts
Making homemade strawberry jam is an easy way to turn fresh strawberries into something you’ll want to put on everything.
And when you pair it with [homemade white bread] and [homemade butter], you’ve got a seriously good from-scratch breakfast without needing anything complicated.
Fresh strawberries + homemade bread + homemade butter = breakfast done right.
Homemade Strawberry Jam
Ingredients
Method
- Prepare the strawberries: Hull and chop the strawberries into small pieces.
- Combine: Add strawberries, sugar and lemon juice to a heavy-bottomed pot. Stir gently and let sit for 15-20 minutes so the berries release their juices.
- Cook: Bring the mixture to a rolling boil over medium- high heat, stirring frequently.
- Simmer: Reduce heat slightly and continue cooking for 20-30 minutes, stirring often.
- Check the consistency: Place a small spoonful on a plate and let cool. With a clean finger, check that the jam isn't too runny. It will thicken as it stands.
- Cool: Remove from heat and let the jam cool for about 10 mins.
- Store: Spoon into clean jars and cool completely then refrigerate.
Leave a Reply